
In the future, it can be assumed that technologically savvy Windows 10 users will make the switch from SATA hard drive to SSD by buying a new computer or upgrading themselves.
Windows 10 has a lot of features that make SSDs work at their peak, but they don't always turn on by default. In addition, there are many principles "to do" when buying SSD no longer need to perform. This article will guide you on some things to do when using SSD hard drive on Windows 10 to know what should and should not do with SSD.
SSDs are rated higher than HDDs because of their high speed and durability. However, you need to pay attention to a few things to optimize the SSD.
1. Avoid the state of computer temperature is too high
SSDs can operate stably in temperatures of 0 - 70 degrees Celsius, higher than HDDs are from 5 to 55 degrees C. It can be seen that SSDs have better resistance. However, if the continuous high temperature will affect the data that users store, it may even lead to data loss. Laptop overheating due to many reasons such as problematic cooling fan, processor overheating, ... We can use some tools to measure CPU temperature, so that there are ways to reduce the machine's heat. necessity.

2. Run the operating system with an SSD
SSDs have a much faster read and write speed than HDDs, so the performance of computers is also increased significantly instead of using HDDs. We can clearly see when running applications installed on, or booting Windows computers will be faster if the operating system installed on SSD. So you should use the SSD and the HDD in parallel, the SSD drive used to install the operating system or software and the HDD drive to store data.
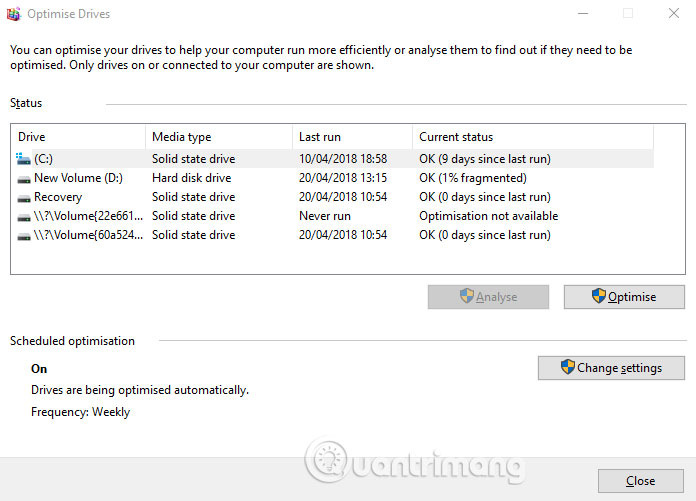
3. Enable TRIM to optimize SDD running speed
The TRIM tool on Windows will clean up garbage, as well as help SSDs work more efficiently, extending the life of SSDs. Although from the Windows 7 TRIM command for SSDs is enabled automatically, users should still check back. When TRIM is enabled, Windows will send instructions to the SSD when we delete a file. SSDs can then automatically delete file content to maintain the SSD's fast working performance.
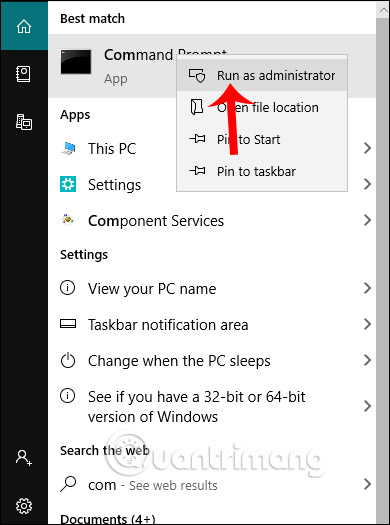
To activate TRIM we first access the Command Prompt (Administrator) to enter the command.
In the interface, enter the following command and press Enter.
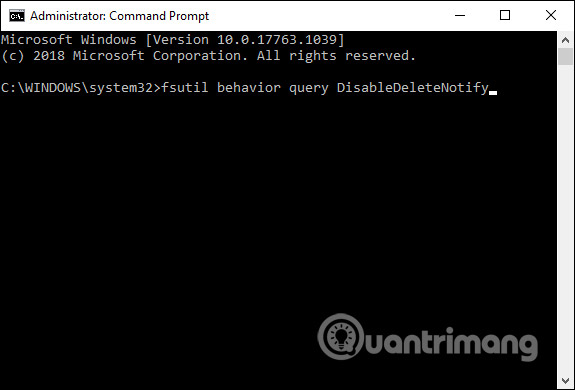
If DisableDeleteNotify = 0 then TRIM is enabled, otherwise DisableDeleteNotify = 1, TRIM is disabled.
4. Update the SSD Firmware
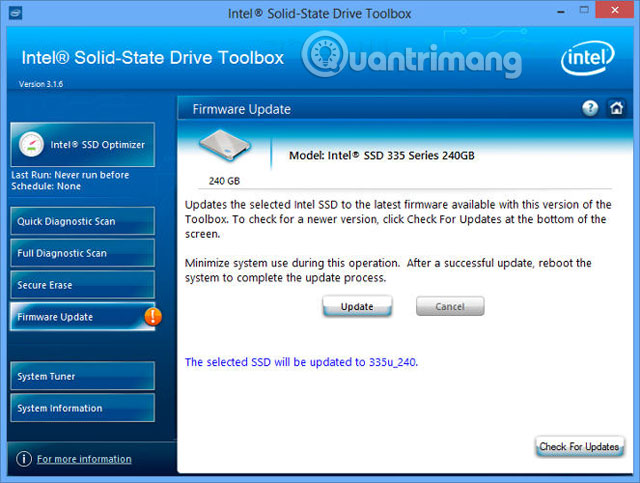
To ensure the SSD runs as well as possible, you should update the firmware for it. However, this process is not automatic and is a bit more complicated when updating the regular software.
Each SSD manufacturer has its own method of upgrading SSD firmware so you need to visit their website and follow the instructions here. However, one tool that can help you is the CrystalDiskInfo, which displays information about your hard drive, including the software version.
5. Turn on AHCI
The Advanced Host Controller Interface (AHCI) is a great feature to make sure Windows will support all the features that come with SSDs on the computer, especially the TRIM feature, which allows Windows to help SSDs do the work. Normal data collection. The term Garbage Collection (data collection process) is used to describe the phenomenon that occurs when the drive discards unused information.
To enable AHCI mode, you need to access the computer's BIOS and enable it in settings. This setting will vary depending on the device, so make sure to search the internet for instructions. There are some newer computers that can enable this feature by default. You should enable this feature before installing the operating system.
6. Check to activate System Restore
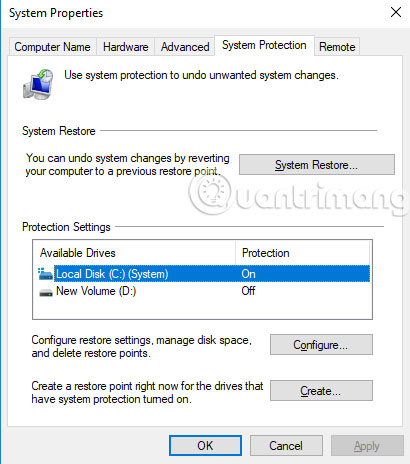
In the past, SSDs were less durable and easier to decompose than today, many people recommend turning off System Restore to improve hard drive performance and life.
Today, however, you don't need to do this redundancy, but certain SSD software like Samsung will automatically turn off System Restore. System Restore is an extremely useful feature, so you should not disable this feature. Visit the System Restore settings to make sure the SSD doesn't turn it off.
7. Disable indexing
Another useful feature of SSDs is file indexing for Windows search when storing everything on SSDs, but you also feel uncomfortable when you experience a slow problem due to the periodic indexing process that occurs every time you add it. New data to the hard drive. Therefore you should turn it off on SSD because speeding up the indexing process is not necessary in an environment like this.
Step 1: Click the Start menu and click on Computer.
Step 2: Right-click on the SSD and click on Properties.
Step 3: Uncheck the box labeled “Allow files to have contents indexed in addition to file properties” and click on OK.
The operating system will then apply to all files and folders on the hard drive. If you see a message box that says you cannot disable file indexing, click on "Ignore All". This will simplify the process and bypass the error.
8. Turn on Windows Defrag
In the past, users thought that defragmenting an SSD was unnecessary and that it could be damaging when defragmentation reduced the number of read / write cycles left on the hard drive.
Today's fragmentation options in Windows 10 are seen as a comprehensive hard drive health tool. If you have planned a defrag, Windows will recognize the SSD and defragment it. This process will retrim the SSD and run the TRIM functions as mentioned earlier.
9. Disable Prefetch and Superfetch
Windows will occasionally place information on the unused and virtual memory of unused programs. It is called "Prefetch" and "Superfetch". If you are having trouble with virtual memory on an SSD, you should perform a search of the two features in the Registry Editor with the values EnablePrefetcher and EnableSuperfetch and set both to 0.
10. Disable services for Windows Search and Superfetch
Even after editing the registry and removing the index, your computer can continue to slow down the hard drive with the corresponding services. Press Win + R, then type services.msc and press Enter. Find two Windows Search and Superfetch services and disable them.
11. Configuring Write Data (Write Caching)
On many SSDs, the level of user data logging has a negative effect on the hard drive. To find out if writing data affects SSDs, disable this option in Windows and see how the hard drive works after that. If the hard drive is performing worse, turn it back on.
To access the configuration window, right click on "Computer" on the Start menu and click on "Properties", select the "Policies" tab. In this tab, you'll see an option that says Enable write caching on the device.
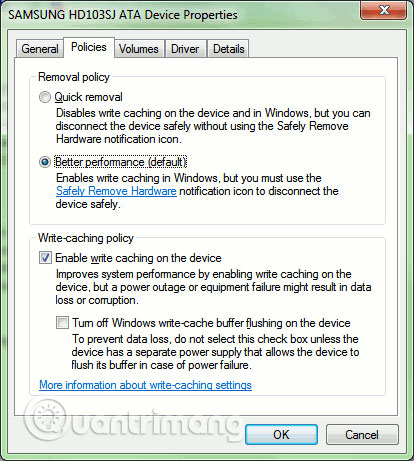
Compare SSDs when enabled and disabled this option and compare the results.
12. Disable ClearPageFileAtShutdown and LargeSystemCache
Windows quickly deploys what is no longer needed. The SSD works on flash memory, making it easy to overwrite everything on the drive. Therefore, there is no need to page file when the computer is turned off. This will make the process of turning off Windows much faster. LargeSystemCache exists primarily in the Server versions of Windows and tells the computer when to use the cache for pages on the hard drive.
You can find these two options in Registry Editor and set the value to 0.
13. Set power options to "High Performance"
When you turn on and off the SSD, you will feel a bit slow when using the computer after a while of not using. To switch power options, access the Control Panel, click on System and Security > Power Options > High Performance. You may have to click Show additional plans to find this option.
On a laptop, you can click on the battery icon in the notification area and select "High Performance" from there.
No comments:
Post a Comment