
The Microsoft Photos app is a UWP (Universal Windows Platform) application that comes pre-installed in Windows 10. It allows you to view, as well as edit photos, videos, create movies and albums.
If you use the Photos app, you can manually back up your settings to restore them as needed on any Windows 10 PC.
This guide will show you how to back up and restore manual settings for the Photos app in Windows 10.
Note: Sources settings for accompanying folders will not be included in the backup.
I. Backup settings from the Photos app
1. If the Photos app is currently open, close it.
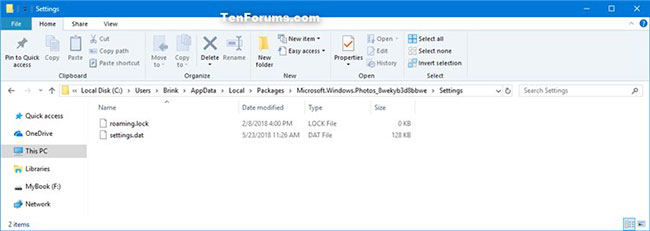
2. Open File Explorer (Win + E), copy (Ctrl + C) and paste (Ctrl + V) the folder location below into the File Explorer address bar and press Enter.
(Current account)
%LocalAppData%\Packages\Microsoft.Windows.Photos_8wekyb3d8bbwe
3. Copy the Settings folder to the desktop.

4. Move the Settings folder on the desktop to the location where you want to save the backup. You can rename this folder to whatever you want.
5. You can now close File Explorer if you like.
II. Restore settings for the Photos app
Restoring a backup of settings in the Photos app will replace the existing app settings.
1. If the Photos app is currently open, close it.
2. Open File Explorer (Win + E), copy and paste the folder location below into the File Explorer address bar and press Enter.
(Current account)
%LocalAppData%\Packages\Microsoft.Windows.Photos_8wekyb3d8bbwe\Settings
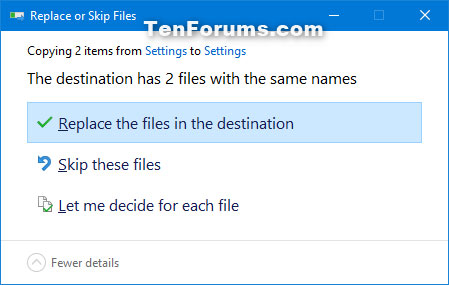
3. In a separate File Explorer window, open the Backup Settings folder from Part 1, select the content in this folder, right-click or hold and hold on the selected items and click Copy (Ctrl + C).

4. Paste (Ctrl + V) the selected files from the backup in step 3 into the Settings folder from step 2.
5. When prompted, click Replace the files in the destination.
6. You can now close the File Explorer windows if you like.
Source: https://totaldrivers.net/tips/tips-step-by-step/item/699-things-to-do-after-buying-a-new-computer
No comments:
Post a Comment