The BIOS setup to select boot from the support tools is a necessary step in the process of reinstalling the computer win. We can use USB / CD / DVD or portable hard drive to reinstall Win.
Therefore, setting this BIOS will help the computer to boot with the corresponding boot devices USB / CD / DVD or external hard drive that we are using. In the following article, we will guide you step by step to set up the BIOS to boot from USB, CD, DVD or external hard drive.
1. Access the computer BIOS:
Depending on the different brands and laptops, the access keys to the BIOS are not the same. For example, with Sony Vaio laptops, we will use the F2 key, Acer laptops will be F12 or F2, and Lenovo will be F1 to access the computer BIOS.
Read the article How to access the BIOS on different computer lines for details on how to access the BIOS the computer is using.
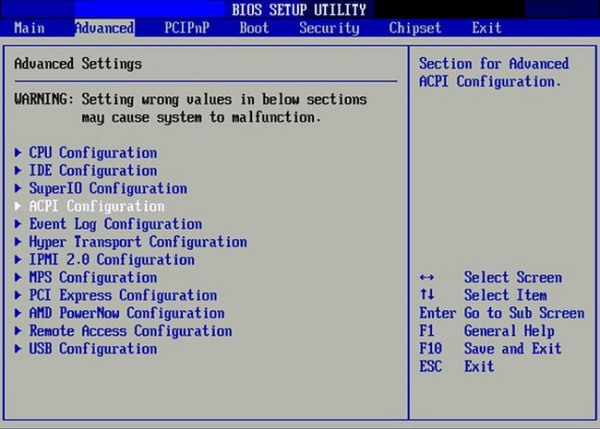
2. Set BIOS to boot:
As mentioned above, the access keys for the BIOS of each model will be different and the BIOS interface may be different, but the steps below will apply to computer models.
Step 1:
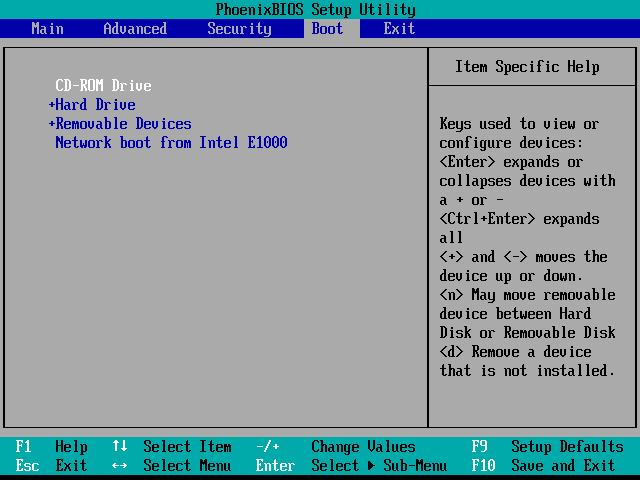
Once we have successfully accessed the BIOS, click on the Boot menu tab. You will see quite a few options as follows:
- Hard Drive: Windows will proceed to boot from the hard drive on the computer. This is the default boot. After reinstalling Windows, we need to go back to proceed with the setup for this option.
- CD-ROM Drive: boot from a CD or DVD drive.
- Removable Devices: use USB or external hard drive to boot. Note to the user, some models of this option will display as External Drive, Removable Device or USB.
Step 2:
Normally, the machine will boot into CD or USB first to check if there are any installation devices such as Windows installation disc, Hirent Boot disc or not.
Next is the boot order on the hard drive to run the operating system. In case the user proceeds to install win or ghost the computer needs to change the default order above.
Case 1:
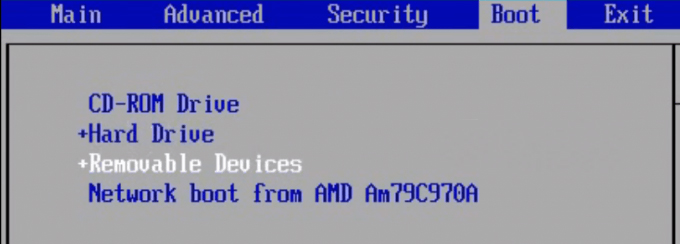
The boot order will always default to Removable Devices. We will use the up and down arrows to change the boot, select the first boot location and press Enter to select.
Case 2:
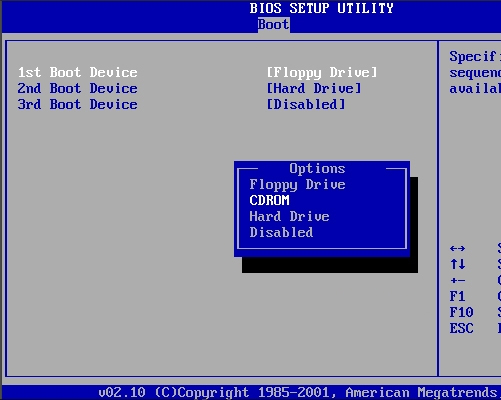
With the order on the left, we use the arrow on the keyboard to select. We go to the first option and press the left or right arrow key, or press Enter to appear the menu, then choose where to boot first.
Case 3:
The interface has a Boot Device Priority section, users will access it and use the arrows to select the part to boot in the 1st Boot Device.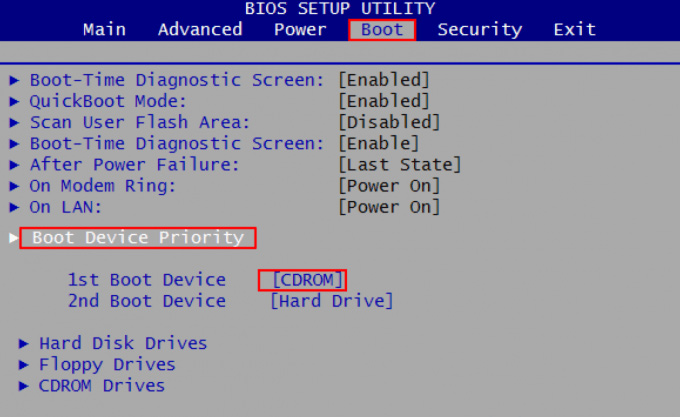
When you don't see the option for USB or External Device, we will look for the Boot Configuration section, the External Device Boot section changes Disabled to Enabled.
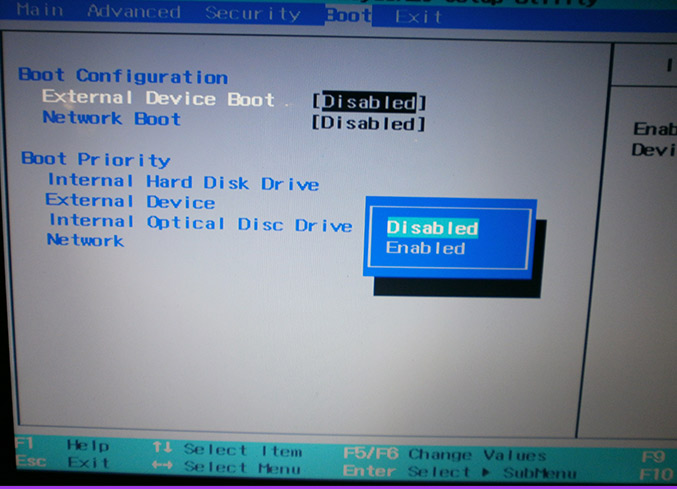
Finally save and press the F10 key to exit the BIOS.


No comments:
Post a Comment